Wednesday, February 1, 2012

Pumpkin Tart

Pumpkins seem to be a favorite ingredient in Wizarding World fare. Add tarts to the equation and you have the perfect dessert for a British Start-of-Term Feast at Hogwarts:

"At long last, when the last morsels of pumpkin tart had melted from the golden platters, Dumbledore gave the word that it was time for them all to go to bed, and they got their chance" (Prisoner of Azkaban 94).

The Unofficial Harry Potter Cookbook contains a recipe that takes this pumpkin tart a step further than simple pumpkin pie. So today we shall make No-Bake Chocolate-Bottom Tart. Except that you do actually bake the crust... so... yeah. Here we go!

For the crust, You Will Need:
1 cup all-purpose flour
1/8 tsp salt
3 Tbs granulated sugar
3/4 stick (6 Tbs) cold butter, cut into chunks
1 large egg yolk
2 Tbs heavy cream
1 tsp vanilla

For the chocolate bottom, You Will Need:
1/2 cup heavy cream
4 oz bittersweet chocolate, chopped


For the pumpkin filling, You Will Need:
1.5 cups canned pumpkin (not pie filling)
1/2 cup granulated sugar
1/2 tsp cinnamon
1/8 tsp allspice
1/8 tsp ground cloves
1/8 tsp ground nutmeg
1/2 cup heavy cream
2 large eggs
1 Tbs cornstarch
1.5 oz bittersweet chocolate, melted, for drizzling, if desired


1. To make the tart dough, place the flour, salt, and sugar in the bowl of a food processor and pulse a few times to combine. Scatter the butter pieces over the flour and pulse until the mixture resembles coarse yellow meal. Transfer to a large mixing bowl.
2. Whisk together the egg yolk, cream, and vanilla and pour over the flour mixture.


3. Toss with a spatula until the dough begins to stick together. Knead into a ball, press into a disk, and wrap in plastic wrap. Refrigerate at least 2 hours or up to 3 days.
4. Preheat the oven to 425 degrees. On a generously floured surface, roll out the tart dough into an 11" disk. Tart dough is hard to roll out, I recommend rolling it twice, and using a lot of flour.  Fit the dough into a 9" tart pan (I don't have one, so I use a pie pan. If you do this, keep in mind that pie pans are deeper!).


5. Prick the bottom of the crust with a fork, cover completely with aluminum foil, and fill with pie weights or beans. Bake for 20 minutes or until the dough is dry and set.


6. Remove the foil and weights, reduce the heat to 350 degrees, and bake for another 10 minutes until the crust is golden brown. Remove from the oven to cool.
7. Place the chocolate and cream in a microwavable bowl and melt them together, stirring at intervals until smooth.
8. Pour the melted chocolate into the crust and let it cool until set. Heads up, this takes a long time. I even put mine in the fridge for awhile, and it still wasn't 100% set when I got impatient and moved on to the next step.


9. While your chocolate is firming up, combine the pumpkin, sugar, spices, and cream in a medium saucepan and cook, stirring frequently, until hot but not bubbling.


10. Whisk the eggs with the cornstarch and add to the pan. Continue cooking, (gently) stirring constantly, until thickened and bubbling. Remove from the heat and cool to room temperature.

11. Pour the cooled filling into the tart shell and smooth the top with a spatula. If desired, drizzle melted chocolate on top. Refrigerate until firm.


It turns out that you really need to let this tart set overnight, otherwise the chocolate will still be liquidy when you eat it. If I made it again, I would definitely use a little less cream in the chocolate bottom mixture, since it didn't become remotely solid until about 12 hours in the fridge. But regardless of the texture (which is kind of like melty pumpkin pie...), this tart is actually quite tasty. The chocolate is very subtle, and compliments the pumpkin flavors very well. So if you decide to try this one out, go easy on the cream. Enjoy!

Friday, January 27, 2012

Chocolate


There are several times throughout the Harry Potter series when chocolate is mentioned without a specification of what kind of chocolate the characters eat. But the first mention of "chocolate" on its own also occurs hand-in-hand with our trio's first conversation with the lovable Professor Lupin:


"A loud snap made them all jump. Professor Lupin was breaking an enormous slab of chocolate into pieces" (Prisoner of Azkaban 84).

Chocolate is kind of an art. Making chocolate is a very involved process that takes place over several days with equipment I definitely don't own. So today, we'll make chocolates, not chocolate. And we're going to use a super easy recipe for "Chocolate Nutella Shapes" I found on the Internet.

A cop out you say?

Who cares? It's delicious, and I want some chocolates.

You Will Need (this recipe makes A LOT of chocolates!):
1 16oz tub chocolate frosting
1 cup Nutella or other Chocolate-Hazelnut spread
2 1/4cups Powdered Sugar
1/4 cup unsweetened cocoa powder
Meltable candy coating

1. Place the frosting and nutella in a mixing bowl and beat together on low until combined.

2. Add the powdered sugar and cocoa powder. Mix together on low until completely incorporated. You may need to use a spatula after awhile.


3. After mixing, you should have a mixture with a texture like play-doh (mine was very grainy, but smushed together well. Gather the dough into a ball and roll it out between two sheets of wax paper until it's approximately 1/2" thick.
4. Use a small cookie cutter (really, a small one! these candies are super-sweet!) and cut out as many "cookies" as you can, re-rolling the dough as necessary.


5. Melt your candy coating according to the manufacturer's instructions. Either dip the candies into the coating, using toothpicks, or cut a small corner off the bag and artistically drizzle the melted coating over the candies.


6. Let the candies set. Store in an air-tight container or bag. I recommend keeping them in the fridge.

Very tasty! They taste a lot like frosting... but that is a major ingredient after all. And I would certainly feel much better about myself after eating a couple of these instead of eating a couple scoops of frosting right out of the can! Bonus, they're super cute to give as gifts! Enjoy!

Thursday, January 26, 2012

Sugar Quills

And so we continue with Ron's introduction to Honeydukes sweets:

"'It's this sweetshop,' said Ron, a dreamy look coming over his face, 'where they've got everything... Pepper Imps-- they make you smoke at the mouth-- and great fat Chocoballs full of strawberry mousse and clotted cream, and really excellent sugar quills, which you can suck in class and just look like you're thinking what to write next'" (Prisoner of Azkaban 77).

To make Sugar Quills like the ones pictured above (from Honeydukes at the Wizarding World of Harry Potter), you should follow my recipe for Pepper Imps, but leave out the cayenne and Tabasco sauce, and add in your choice of food coloring. Then you'll want to either use a feather-shaped mold, or very quickly drizzle your feather shape on a sheet of wax paper.

That seems pretty labor-intensive.

I decided to use Wilton's Candy Melts: Way faster, and they taste like chocolate! Another plus? A pastry bag filled with melted couverture is much easier to free-hand feathers with than a teaspoon of melted sugar syrup!

You Will Need:
A bag of Wilton's Candy Melts in your chosen color
Wax paper

1. Melt your candy/chocolate according to the bag's instructions.
2. Cut a tiny hole in one corner of the bag and quickly begin using the melted chocolate to "draw" your feathers on the wax paper.


3. If you want to get really fancy, after the feathers have hardened, you can melt two feathers together with an ink pen in between! That way you really can suck on your sugar quill while thinking about what to write next!


These are super easy to make, and would make a cute addition to a dessert table at a Harry Potter party! Enjoy!

Tuesday, January 24, 2012

Chocoballs


Next on the list of Honeydukes delights? Cream-filled chocolates!


"'It's this sweet shop,' said Ron, a dreamy look coming over his face, 'where they've got everything... Pepper Imps-- they make you smoke at the mouth-- and great fat Chocoballs full of strawberry mousse and clotted cream, and these really excellent sugar quills, which you can suck in class and just look like you're thinking what to write next'" (Prisoner of Azkaban 77).

If you'd like, you can fill your chocoballs with clotted cream (which is very tasty), but it costs around $8 a (very tiny) bottle. I'll stick to strawberry mousse, thanks.

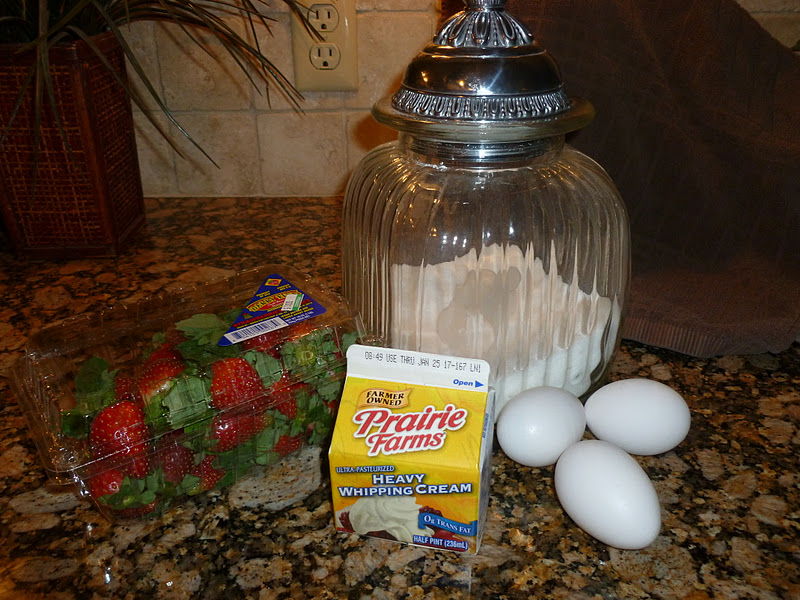
To Make Strawberry Mousse, You Will Need:
2 cups hulled fresh strawberries
1 Tbs sugar
1/2 pint heavy cream
3 egg whites

1. Chop hulled strawberries in a food processor, leave a few chunks. Mix in the sugar.


2. In a bowl, whip the cream with an electric mixer until stiff peaks form.


3. In another bowl, beat the egg whites with an electric mixer (with clean beaters) until stiff peaks form.

4. Fold the whipped cream into the strawberries. Mix well.


5. Fold the egg whites into the strawberry mixture. Mix well. Pop in the fridge until you're ready to use it.


For Strawberry Chocoballs, You Will Need:
Melting chocolate (couverture-- I recommend Wilton Melting Chocolate)
Strawberry Mousse (the above recipe makes about 100 times more than you need)
Candy/truffle molds

1. Melt your chocolate according to manufacturer's instructions.
2. Squeeze a bit of melted chocolate into each truffle cavity. Use your (washed!) fingers to be sure that a thin layer covers the whole cavity. Let the chocolate set.


3. Use a teaspoon to drop a small amount of strawberry mousse into each little chocolate bowl.
4. Squeeze more chocolate over the strawberry mousse, encapsulating it inside the chocoball. You make need to use your fingers again to gently smooth it out  bit.


5. Let the chocolate set, and then place the molds in the fridge for at least ten minutes. The colder the chocolates, the easier they will be to un-mold.
6. Carefully pop the chocoballs out of the molds. Be gentle and patient. I popped the bottoms off several of mine before I got the hang of it.


Though a little bit labor-intensive, these are quite delicious! And bonus, they look really impressive when you tell people you made them yourself! Enjoy!


Monday, January 23, 2012

Pepper Imps

We are entering a section that will take awhile to get through-- Ron's first description of Honeydukes:

"'It's this sweetshop,' said Ron, a dreamy look coming over his face, 'where they've got everything... Pepper Imps-- they make you smoke at the mouth-- and great fat Chocoballs full of strawberry mousse and clotted cream, and really excellent sugar quills, which you can suck in class and just look like you're thinking what to write next'" (Prisoner of Azkaban 77).

So first, we take on Pepper Imps. I have not, however, been able to find any real instructions on how to make this candy. So I'm going to make it up! A heads up, pepper imps are eventually described as being black in color, but I couldn't find black food coloring. And even if I could, I think I'd be afraid that it would stain my candy mold!


At The Wizarding World of Harry Potter, Honeydukes sells red Pepper Imps, which taste like cinnamon, similar to red hots. But cinnamon doesn't conjure up the image of smoking at the mouth, so I will use cayenne pepper!

You Will Need:
Cooking spray
Corn starch
1/4 cup Light Corn Syrup
1/8 cup water
1/2 cup Sugar
Cayenne Pepper
Tabasco Sauce (I added this as an afterthought)
Candy Molds
Candy Thermometer

1. Combine the water, sugar, and corn syrup in a small saucepan. Add a bit of the cayenne pepper.

2. Spray your candy mold with cooking spray and dust with the cornstarch. Tap off the excess.
3. Heat the mixture on medium, stirring occasionally, until the sugar is dissolved. Continue cooking, stirring often, until the mixture is 300 degrees. Remove from the heat.


4. Quickly stir in some more cayenne pepper, and a few dashes of Tabasco sauce.
5. Use a teaspoon to drizzle the syrup into the candy molds. Work quickly, as the mixture will begin to harden pretty fast!


6. Let the candy harden. When the candies are cool, pop them out and rub off any excess cornstarch or oil with a paper towel.


Be careful when you enjoy these! They really do pack some heat! My Dad, who loves spicy things, couldn't finish his! Looks like my first candy recipe was a success! Hooray!

Saturday, January 21, 2012

Chocolate Pudding

Food is always seems to be delicious when the Weasleys are around, even if Mrs. Weasley isn't the one cooking!

"'How're we getting to King's Cross tomorrow, Dad?' asked Fred as they dug into a sumptuous chocolate pudding" (Prisoner of Azkaban 63).

Lucky for us, there is a recipe for a British-style chocolate pudding in The Unofficial Harry Potter Cookbook. Ms. Bucholz also includes a recipe for American-style pudding, but I wouldn't generally describe something whose equivalent can come in plastic Jell-O cups as "sumptuous." Today we shall make a Sumptuous Chocolate Pudding!

You Will Need:
1 stick unsalted butter
4 ounces bittersweet chocolate, chopped (I used semi-sweet chocolate chips, a good choice in my opinion)
1 cup all-purpose flour
1/2 unsweetened cocoa powder
1/4 tsp salt
1 1/4 cups granulated sugar
1 tsp vanilla
2 large eggs, at room temperature
1/2 cup whole milk

1. (Generously) Grease and flour a 1.5 quart pudding bowl or a heatproof glass or ceramic bowl with a tight-fitting lid (grease and flour the lid too). Casserole dishes work well too. Place some kind of trivet (overturned shallow bowl, jam jar lid, etc.) inside a large pot with a lid. Be sure the pudding dish fits inside it... I forgot which dish I usually use to make steamed puddings and started out with one that was too big. Lame.
2. Melt the butter and chocolate together in the microwave and whisk until smooth. Set aside to cool.

3. Whisk together the flour, cocoa powder, and salt in a separate bowl.


4. In yet another bowl, whisk together the sugar, vanilla, eggs, and milk until smooth.


5. Whisk the chocolate mixture into the egg mixture until smooth.


6. Add in the flour mixture and mix with a wooden spoon or spatula until combined. 


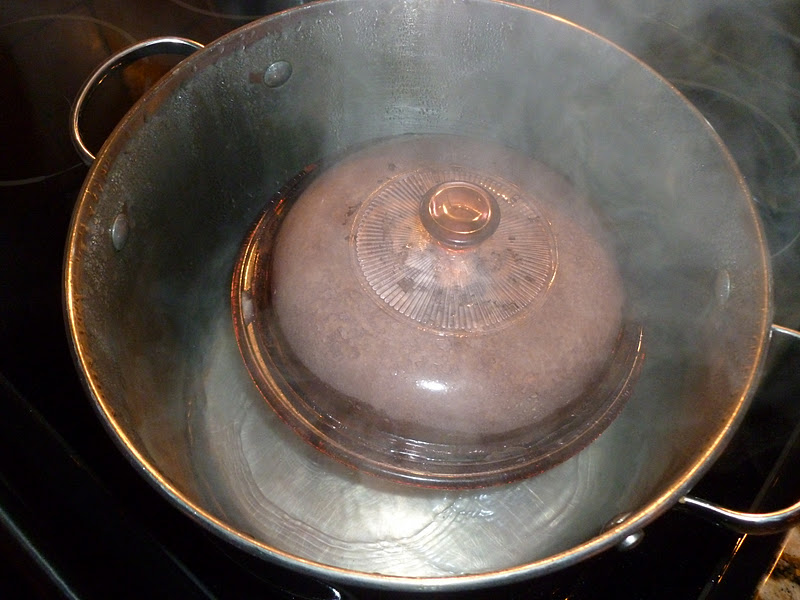
7. Scrape the batter into the prepared pudding dish. Cover the bowl with the lid, making sure it is secure. Note that in this photo, I obviously didn't realize yet that my pudding dish was too big. Your dish should be much more full.


8. Place the pudding dish inside the pot, on top of the trivet. Add water until it reaches halfway up the side of the pudding bowl. Place the top on the pot and boil for 3 hours, checking the water level occasionally and adding more water if necessary. 


9. Remove the pudding from the pot (carefully!) and uncover. Let it cool for 30 minutes (oops, I didn't do that). Then turn it upside down on your serving plate to un-mold it. Serve warm with whipped cream or a scoop of vanilla ice cream.


Holy sumptuousness, Batman! This pudding literally melts in your mouth! Delicious and decadent, rich but not overpowering. So tasty. So so tasty. I highly suggest you make some for yourself (especially if you are celebrating your last night at the Leaky Cauldron before heading off to another year at Hogwarts!). Enjoy!