Saturday, August 18, 2012

Black Currant Ice Cream

My friends, I have finally returned! So sorry to keep you waiting, but I've been moving to a new house in a new state for a new job. Not a lot of time available to blog in the last week or two! And I'll let you know ahead of time, what with moving and everything, the purse strings are going to be a bit tight until October. I'll blog as much as I can, but probably not my normal 2-3 times a week of making exciting and gratuitously expensive food! But never fear, I promise we will eventually get through the rest of our journey!

For now, we move on to a lovely food used to describe Uncle Vernon's fearful complexion:

"Now he watched the purple recede blotchily from Uncle Vernon's face, making it look like badly mixed black currant ice cream" (Goblet of Fire 33).

I've mentioned before that black currants are difficult to get ahold of in the U.S., but you can usually find black currant jam or jelly. So I've decided to make vanilla ice cream swirled with black currant.

You Will Need:
1.5 cups whole milk
1 1/8 cup granulated sugar
3 cups heavy cream
1.5 Tbs vanilla (preferably a brand that does not include alcohol in the ingredients!)
Black currant jelly, jam, or preserves


1. In a mixing bowl, combine the milk and sugar, mixing until the sugar is dissolved. 
2. Stir in the heavy cream. Some recipes will tell you to add the vanilla now, and I, not thinking clearly, did this also. But if you add the vanilla now, your ice cream will never fully freeze!
3. Refrigerate this mixture until very very cold.
4. Pour the mixture into the bowl of your ice cream maker and freeze according to the manufacturer's instructions. About 5 minutes from the end of the freezing time, add the vanilla.

5. Just before it's finished, drizzle in your black currant. Let the ice cream maker continue to run until the ice cream is swirled (or combined) to your liking.


6. Remove the ice cream from the ice cream maker and transfer to an air-tight container. If the ice cream seems too soft, pop it in the fridge for ten minutes before serving. 

Since I added the vanilla too early, my ice cream was really soft. Also, I had less currant jelly than I thought. It was still quite tasty, but next time I'll definitely use more currant. I hope you enjoy!

Thursday, August 2, 2012

Four Superb Birthday Cakes (pt. 4)

My friends we have finally reached Harry's last birthday cake in The Goblet of Fire:

"And then on Harry's birthday (which the Dursleys had completely ignored) he had received four superb birthday cakes, one each from Ron, Hermione, Hagrid, and Sirius" (Goblet of Fire 28).

As you can see, our last birthday cake is from Sirius. Since his letters arrive to Harry via tropical birds, Dinah Bucholz decided that Sirius would probably send a tropically-flavored cake, so we are making Citrus Sandwich Cake with Mango Filling.

For the Cake, You Will Need:
2 cups cake flour (all-purpose works fine too)
1 cup granulated sugar
1 tsp baking powder
1/4 tsp salt
1.5 sticks (12 Tbs) unsalted butter, at room temperature
1/2 cup whole milk
3 large egg yolks, at room temperature
grated zest and juice of 1 lemon
grated zest and juice of 1 orange
1 tsp vanilla extract
3 large egg whites, at room temperature


For the Mango Filling, You Will Need:
3 ripe mangoes, peeled and cut into chunks
1/2 cup granulated sugar
1/2 cup water
pinch salt
2 Tbs cornstarch
3 large eggs yolks
1/4 stick (2 Tbs) unsalted butter
juice of 1 lemon

For the Whipped Cream Frosting, You Will Need:
2 cups heavy cream
2/3 cup confectioner's sugar
2 tsp vanilla extract
a few drops of yellow food coloring


1. Preheat the oven to 350 degrees. Grease and flour two 8" round cake pans and line the bottoms with parchment paper.
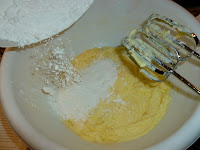
2. Whisk together the flour, 1/2 cup of the sugar, baking powder, and salt. Add the butter and beat until the mixture resembles yellow crumbs.
3. Add the milk, yolks, grated zest and juice of the lemon and orange, and vanilla and beat until smooth.

4. In a separate clean bowl, with clean beaters, beat the egg whites until soft mounds form. Continue beating while adding the remaining 1/2 cup of sugar gradually. Beat until stiff but still glossy. 

5. Whisk 1/4 of the egg white mixture into the batter to lighten it, then fold in the rest using a rubber spatula.

6. Divide the batter evenly between the two prepared pans and bake for 20-25 minutes, until the cakes are spotty brown and feel firm when touched lightly in the center. Do not over-bake or the cakes will be dry. Cool in the pans. If you need to, the cakes can be wrapped in plastic and frozen until needed (in case you're spreading your baking over multiple days).


7. To make the filling, process the mangoes in a food processor or blender until smooth, then push through a sieve with a rubber spatula, extracting as much juice as possible. Note: I am the most impatient baker ever. I hate straining things, as you may recall. I didn't strain the pulp out of my mango juice, and my custard was fine, there was just a whole lot of it, and it was more textured than normal. If you are impatient like me, and you don't want textured custard, I suggest finding a source for unsweetened mango nectar.

8. Transfer your liquid mango to a medium saucepan. Add the sugar, water, salt, and cornstarch and stir to dissolve. Cook over medium heat until warm, stirring constantly.
9. Whisk in the egg yolks and cook, stirring constantly, until thickened and bubbling. 
10. Remove from the heat, add the butter and lemon juice, and stir until melted and combined.

11. Transfer the filling to a bowl, cover the surface directly with plastic wrap, and cool to room temperature. Refrigerate until needed, up to two days. 
12. Make the frosting just before you're ready to assemble the cake. Whip the frosting ingredients (except the food coloring) together until stiff peaks form.


13. To assemble the cake, split the cake layers in half. Place one layer on your serving plate and spread 1/3(ish) of the mango filling on top. Repeat with the next two layers, stacking the layers into a cake tower. Top with the last layer. 


14. Cover the top and sides of the cake with the whipped cream frosting. Tint the remaining frosting with the yellow food coloring and scoop it into a pastry bag. Use the yellow frosting to pipe a decorative border around the edges of the cake.


This cake is a bit time consuming to make, but the end result is worth it! This cake is both rich and refreshing at the same time. It also stays moist days later, though I recommend keeping it in the fridge, as the frosting melts pretty quickly. An excellent choice for a summer birthday party! Enjoy!


Wednesday, August 1, 2012

Four Superb Birthday Cakes (pt. 3)

Today we wish a Happy Un-Birthday to Harry Potter as we continue plowing through his four birthday cakes that appear in The Goblet of Fire (seriously, I have cake coming out of my ears at this point):

"And then on Harry's birthday (which the Dursleys had completely ignored) he had received four superb birthday cakes, one each from Ron, Hermione, Hagrid, and Sirius" (Goblet of Fire 28).

According to Dinah Bucholz, Hagrid's birthday cake for Harry is quite simple and very British: Custard Sponge Sandwich Cake. So let's jump right in!

For the Sponge Cake, You Will Need:
1.5 cups all-purpose flour
1 tsp baking powder
1/4 tsp salt
1.5 sticks (12 Tbs) butter, at room temperature
1 cup granulated sugar
3 large eggs, at room temperature
Confectioner's sugar, for dusting


For the Custard Filling, You Will Need:
1 cup whole milk plus 1/2 cup heavy cream  (or 1.5 cups whole milk)
1/4 cup granulated sugar, divided
3 Tbs cornstarch
pinch salt
3 large egg yolks
1/2 tsp vanilla extract
1 Tbs butter (if not using the heavy cream)
whipped cream, for serving

1. Preheat the oven to 350 degrees. Grease two 8" cake pans and line the bottoms with parchment paper.
2. Whisk together the flour, baking powder, and salt in a mixing bowl and set aside.
3. Using an electric mixer, beat the butter and sugar in a large bowl until light and fluffy, scraping down the sides as needed, about 5 minutes.
4. Add the eggs to the butter one at a time, beating after each until incorporated and scraping the sides as needed. 


5. Add the flour mixture and mix on the slowest speed until combined. Finish by scraping down the sides and folding the batter together with a rubber spatula.


6. Divide the batter evenly between the two pans and bake for about 20 minutes until the cakes are golden brown around the edges (the tops will still be pale) and they feel soft but firm when touched in the center or a toothpick inserted comes out clean. Let the cakes cool in the pans for 10 minutes, then invert onto a wire rack to cool completely.


7. To make the custard, combine the milk or milk and cream, 2 Tbs of the sugar, cornstarch, and salt in a small saucepan and mix until the cornstarch is dissolved.


8. Whisk the yolks with the remaining sugar in a medium bowl until smooth. 
9. Heat the milk mixture over medium-high heat, stirring constantly, until it is hot but not bubbling. Reduce the heat to low. 
10. Temper the egg yolk mixture by pouring 1/2 cup of the hot milk into the yolks while whisking constantly. Pour the yolk mixture slowly back into the saucepan while stirring constantly.
11. Return the pan to medium-high heat, stirring constantly, until the mixture thickens and begins to boil (handle gently after it starts to thicken or the cornstarch will lose it's thickening powers!).
12. Remove the pan from the heat and add the vanilla. Add the butter if you did not use heavy cream. Stir gently until combined (and the butter is melted). If you're picky about lumps, strain the custard through a sieve. Cover with plastic wrap and refrigerate until cold.

13. To assemble the cake, place one cake layer top-side down on your plate and spread the custard over the cake to within 1/2" of the cake's edge. Top with the other layer (top-side up) and dust with confectioner's sugar. Keep the cake refrigerated, but bring to room temperature before serving. Serve with whipped cream.


This simple cake is quite delightful! An excellent choice to serve with tea at your next social gathering or birthday party! Enjoy!